Category: Fitness Lifestyle

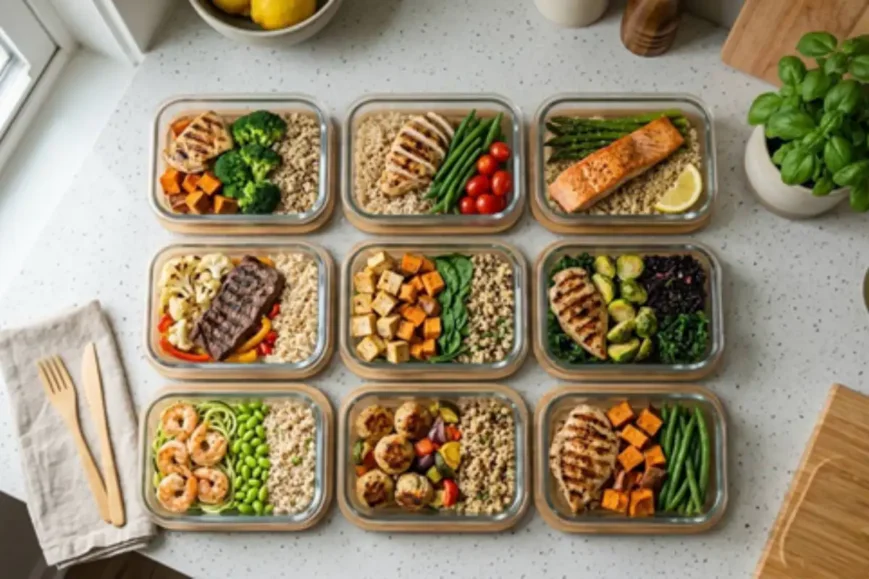
  • Healthy meal prep containers with grilled chicken, salmon, shrimp, vegetables, quinoa, and sweet potatoes arranged on a kitchen countertop.

    Most guides about batch cooking focus on recipes, macros, and cooking techniques, but the meals that actually get eaten during a busy training week depend on something less glamorous: how they are stored, portioned, and found again. Even well-planned meal prep storage containers can fail their purpose if the food inside them disappears into a disorganized freezer and never resurfaces before it spoils or gets replaced by takeout. This article looks at the storage side of meal prep, from portioning and labeling to the kind of freezer layout that keeps cooked food visible and usable throughout the week, rather than forgotten at the back of a drawer.

    TL;DR — Key Takeaways

    • Meal prep fails as often from poor storage and visibility as from poor cooking; food that can’t be found or identified quickly gets skipped in favor of convenience options.
    • Single-portion freezing, clear labeling with dates, and first-in-first-out rotation keep meal prep storage containers useful for weeks rather than days.
    • A freezer setup with clear-fronted, smooth-running drawers makes it easier to scan and reach prepped meals without unpacking everything.
    • Pairing a fixed prep day with a short weekly inventory check turns meal prep into a repeatable habit instead of a one-time effort.

    Why Meal Prep Is the Hidden Variable in Most Transformation Plans

    Training programs tend to get the credit or the blame when a transformation stalls, but nutrition consistency is usually decided earlier, in the kitchen, days before a workout even happens. A batch of cooked chicken and rice only supports a training goal if it gets eaten instead of a delivery order, and that depends heavily on whether the person can actually see and reach it when hunger and time pressure hit at the same moment.

    Prepped meals lose their value the moment they become invisible. Once a container gets pushed behind other items or buried under ice buildup, it stops functioning as a meal and starts functioning as freezer clutter. The cooking effort was real, but the payoff never arrives, and the natural response is to order food instead, which quietly undoes the discipline built during the actual prep session.

    This is where rotation discipline matters as much as the cooking itself. A first-in-first-out approach, where older meals are moved to the front and used before newer ones, prevents a slow pile-up of forgotten portions. Without that habit, a freezer fills with good intentions rather than usable meals, and the person doing the training ends up shopping and cooking again from scratch, week after week, without ever drawing down what was already prepared.

    Batch Cooking Basics: Portions, Labeling, and Rotation

    Good batch cooking starts with how the food is divided, not just how it is prepared. Cooking a large tray of protein and grains is efficient, but storing it as one large block works against the goal of quick, grab-and-go meals during the week. Single-portion freezing, where each meal is sealed and frozen separately, beats large batch blocks because it lets someone take out exactly what is needed without thawing far more food than the moment calls for.

    Labeling solves a different, equally common problem: the unidentifiable frozen meal. Once several dishes go into the freezer over consecutive weeks, containers of similar-looking rice, sauce, or ground meat become impossible to tell apart just by looking through a frosted lid. Dating each container, ideally with both the contents and the day it was made, removes the guesswork and makes rotation possible in the first place, since nobody can prioritize older meals they can’t identify.

    A practical batch-cooking routine tends to follow a consistent sequence:

    • Cook and cool the full batch before portioning, so heat doesn’t create condensation inside sealed containers.
    • Divide into single servings sized for one meal, not a family portion.
    • Label each container with contents and date, then place new batches behind older ones.
    • Reassess weekly, moving anything unused for too long to the front of the queue.

    Followed consistently, this sequence turns a single cooking session into several days of ready meals that stay identifiable and accessible, rather than a mystery collection that eventually gets thrown out during a freezer clean-out.

    Storage That Keeps Prepped Meals Visible and Accessible

    Portioning and labeling solve half the problem; the other half comes down to the physical storage itself. A freezer where every shelf is opaque and deep forces a full unpacking session just to find one meal, which discourages the quick daily grab that meal prep is supposed to enable. Drawer-style storage changes this dynamic by letting food sit in defined, separate compartments that can be scanned without disturbing everything around them.

    A drawer with a clear front adds a further layer of convenience, since it allows someone to see roughly what’s inside before pulling it open, cutting down on the trial-and-error of checking drawer after drawer while holding the freezer door open. That matters more than it sounds, because every extra second spent searching in a cold, open freezer is a moment where the easier option, ordering food instead, becomes more tempting.

    Reaching items also gets harder as a freezer fills up with a full week’s worth of batches, which is exactly when smooth-running telescopic drawer rails start to matter. Rails that extend fully let a drawer glide out far enough to reach containers stored toward the back, rather than leaving them wedged out of reach behind whatever was loaded most recently. One example of this kind of layout appears in a fully integrated freezer built around drawers, such as the arrangement found in the integrated Freezer 60 / 40 range, which combines a transparent drawer front for a quick overview of contents with telescopic rails designed to keep even back-of-drawer items within easy reach. For someone rotating several weeks of batch-cooked meals at once, that kind of quick-overview access can be the difference between a freezer that gets used properly and one that quietly becomes a storage graveyard.

    Building a Weekly Prep-and-Store Routine That Sticks

    A single successful batch-cooking session doesn’t build a habit; a repeatable weekly structure does. Setting a fixed prep day, the same day each week, turns meal prep from a decision into a routine, removing the mental negotiation of whether or when to do it. Pairing that fixed day with a short freezer inventory check, just a quick look at what’s left before deciding what to cook next, keeps the rotation working as intended and reduces the food waste that comes from cooking a fresh batch while older meals sit forgotten underneath it.

    Grouping meals by macro type rather than by finished dish also speeds up daily assembly. Instead of freezing ten identical containers of one recipe, storing separate portions of protein, carbohydrate, and vegetable components lets someone mix and match based on what they’re in the mood for, without losing the speed advantage of having everything pre-cooked. This approach trades a bit of recipe variety planning for a lot of flexibility at mealtime, since a protein portion can pair with different sides throughout the week instead of locking every meal to one fixed combination.

    The inventory check itself doesn’t need to be elaborate. Glancing through the drawers, noting what’s aging toward the front, and planning the next cooking session around using those items first is enough to keep the system self-correcting. Over several weeks, this turns the freezer into something closer to a small, organized pantry for the training program, rather than a place where cooked food goes to be forgotten. The habit compounds: each week’s shopping list gets shaped by what’s already stored, which naturally reduces both waste and the temptation to default to convenience food when the freezer visibly still has usable meals in it.

    Frequently Asked Questions

    How long do batch-cooked meals typically stay good in a freezer compared to a fridge?

    Freezer storage generally extends how long cooked food stays safe and appetizing far beyond what refrigeration allows, since freezing slows the microbial and enzymatic activity responsible for spoilage almost to a stop. A fridge only delays that activity, which is why fridge-stored batches are meant for the first few days after cooking, while freezer-stored portions are the ones meant to carry a meal-prep routine through a full week or longer. Exact timeframes vary by dish, fat content, and how well a container is sealed, so treating labeling and rotation as the real safeguard matters more than relying on a fixed rule of thumb.

    Does reheating from frozen affect texture enough to matter for daily meals?

    Texture change depends heavily on the ingredient: rice and most cooked grains reheat well from frozen, while some vegetables and delicate proteins can turn noticeably softer once thawed. This happens because ice crystals forming during freezing rupture some of the food’s cell structure, so moisture escapes faster during reheating. Portioning meals with this in mind, for example freezing sauces and grains more freely than delicate garnishes, keeps daily reheated meals closer to their original quality.

    What’s the simplest way to start a meal-prep storage system without overhauling everything at once?

    Starting with portioning and labeling alone, before worrying about freezer layout, already solves much of the visibility problem discussed earlier. Once single-portion containers with dates become a habit, evaluating whether the current storage space makes rotation easy or difficult is a natural next step, and adjustments to the setup can follow from there rather than being planned in advance.

  • Ankle Mobility Exercises

    Ankle mobility exercises are essential for activities such as running, jumping, lifting, and performing almost any physical activity an individual is required to perform. Free and mobile ankle joint may have an added advantage in performance, will lower the chances of an athlete getting injured besides making the athlete more efficient in his movement. Here’s a comprehensive guide to ankle mobility exercises:

    What You Need to Know About Ankle Mobility?

    • Improves Performance: Frees athletic movements and tunes up strength training.
    • Prevents Injuries: Helps prevent ankle sprains, shin splints, and knee injuries.
    • Enhances Balance and Stability: With improved mobility, the balance that one gets is bound to be better, increasing overall stability.
    • Facilitates Proper Movement Patterns: Promotes good and accurate biomechanics to avoid bad compensations.

    Assessment of Ankle Mobility Exercises

    Before starting exercises, assess your ankle mobility:

    Knee to Wall Test: Stand parallel to a wall with your back facing the wall, extend your one leg at a distance of a few inches from the wall, and attempt to bring the knee touching the wall by bending the knee without letting the toe of the behind leg touching the wall, the behind leg remains flat on the floor. Take the distance from the outer part of the big toe to touching the wall. Typically, achieving a separation of 4-5 inches is practical as sufficient mobility.

    Dorsiflexion Test: Stand up and sit on a chair; put a ruler on the ground and see how far you can bend your knee to touch your toes without touching the heel with your hand.

    Stretches to Make Your Ankle More Flexible

    1. Ankle Circles

    • Stand with one leg on a step stool or a bench, or sit on a chair with one leg tucked under your body.
    • Circle your ankle in the clockwise and counterclockwise direction 10 to 15 times.
    • Make 10-15 circular motions clockwise for each ankle and the same in the counterclockwise direction.

    2. Calf Stretch

    Ankle Mobility Exercises - Calf stretch

    • It is performed by standing with the right foot forward and the left foot backward close to the wall.
    • Lock the back leg and ensure that the front knee is slightly bent.
    • Contract your ‘‘core’’ by pulling your belly button towards your spine and pushing your hips forward for 20-30 seconds.
    • Do 2-3 cycles for each limb.

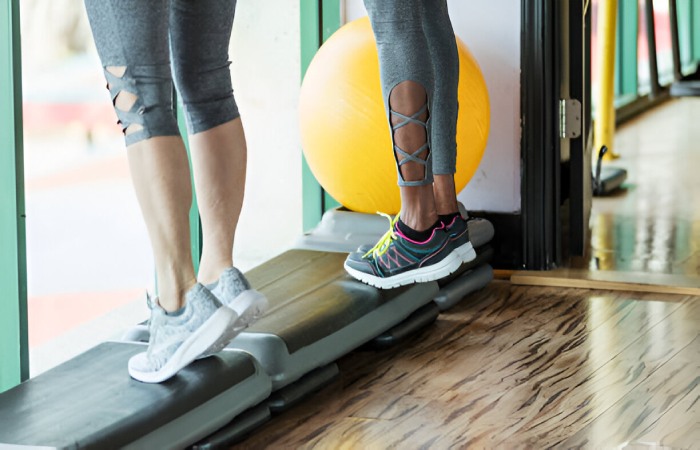
    3. Heel Raises

    • This body position can be described as follows: First, the patient should stand with their feet wider than shoulder-width but not more than hip-width.
    • Lift your heels off the floor and keep it suspended for some time.
    • Lower your heels as you slowly bring them back to the ground in a controlled motion.
    • Doing pull-ups 15-20 times for 2-3 sets is recommended.

    4. Toe Raises

    • Bring your feet into a natural shoulder-width stance or a tad closer.
    • Bend your right knee toward your buttocks while lowering your right toes toward the floor – do not let the heel touch the floor.
    • Wait for a couple of seconds, and then lower your toes.
    • One should repeat the motions about 15 to 20 times, which should be done in sets of 2 to 3.

    5. Ankle Dorsiflexion Stretch

    • Lie in a crawling position with the knees bent so that one knee will be forward, thus changing the position of the footrest three.
    • Bend forward, continuing to press your knee over your toes.
    • You should bend your knee and keep the heel flat on the ground, maintaining this position for 20-30 seconds.
    • It is recommended to repeat it 2-3 times for each leg.

    6. Band-Resisted Ankle Dorsiflexion

    • Attach a resistance band to something stationary and wrap it around your lower leg and ankle.
    • Bring your foot towards yourself, with your ankle bending.
    • Gradually bring back your body to the position that it was before the squat.
    • For the scapular stabilization, do 15-20 for 2-3 sets.

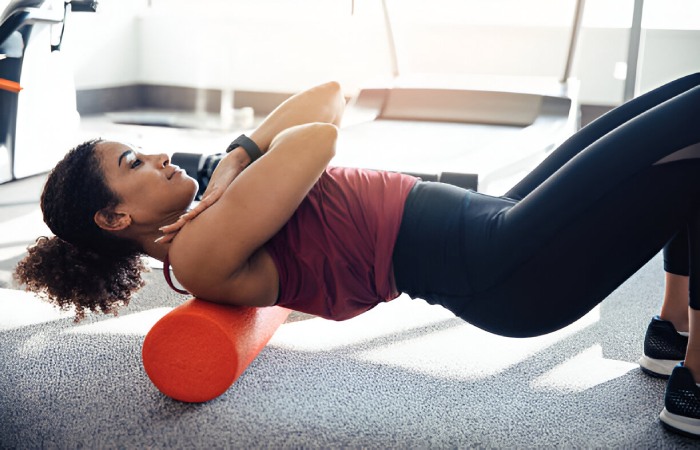
    7. Foam Rolling

    Foam Rolling

    • Applying a foam roller on your calf muscles will help relieve tension.
    • Perform the stressed rolling motion starting at the ankle and going up to the knee for approximately 1 to 2 minutes on each leg.
    • If it is still tender to the touch following rolling, focus on the tight or sore areas.

    8. Ankle ABCs

    • Cross one leg over the other quickly and place the foot that is soaring in the air on the ground.
    • Sweep the alphabet down the floor with the bottom of your foot, turning your ankle into a steering wheel.
    • Run the alphabet from start to finish for each ankle, for a total of 26 letters.

    Best Practices in Ankle Mobility Exercises

    • Consistency: As for mobility, practice is the key in this sector. Instead, the frequency is used frequently as it is practiced consistently to be regarded as effective.
    • Warm-Up: Before doing mobility exercises, you must always warm up.
    • Progress Slowly: Gradually build up the type and length of exercise programs.
    • Focus on Form: Caution to prevent possibilities of injuries during exercise and also to get the most out of the exercise.
    • Listen to Your Body: As a rule, it is inadvisable to ‘muscle through the pain’; instead, constantly endeavor to change the set of exercises when feeling discomfort.

    Conclusion

    Therefore, integrating the listed ankle mobility exercises can help you boost your performance and minimize your risk of injury. Nonetheless, self-evaluate your mobility regularly and modify your exercises according to your advancements and requirements.


  • IOFBodies.com Applications: Complete Health Tech Guide 2025

    IOFBodies.com applications are changing the game, and honestly, I’m surprised so many people are still sleeping on this technology.

    Look, I get it. You’re probably wondering what the heck IOB even means, right? Perhaps you’ve heard about these body-connected devices, but never fully grasped how they could benefit you. Or maybe you’re sitting there thinking, “Great, another tech thing I need to learn.”

    I’ve been diving deep into this space, and let me tell you – iofbodies.com applications aren’t just some fancy gadget trend. They’re reshaping how we think about health monitoring, fitness tracking, and personal wellness.

    What Are IOFBodies.com Applications?

    Here’s the deal. IOFBodies.com applications are a comprehensive platform that revolutionizes human lives by leveraging the Internet of Bodies (IoB), seamlessly integrating human behavior with advanced technology.

    Think of it this way – remember when we had to guess how many steps we took or wonder if our heart rate was normal during workouts? Those days are done.

    These applications use something called the Internet of Bodies (IoB). It’s like having tiny smart sensors that connect with your body to give you real-time data about what’s happening inside and outside your system.

    The core components include:

    • Advanced body sensors that track multiple health metrics
    • Real-time data processing systems
    • Personalized health analytics
    • Interactive monitoring dashboards
    • Custom wellness recommendations

    Real-Time Body Monitoring That Works

    The real-time body monitoring with AI is real, and the iofbodies.com applications are just doing it.

    I remember the first time I saw this in action. My buddy Jake was using one of these systems, and his phone buzzed with a notification about his hydration levels dropping during our hike. Not some generic reminder – an actual alert based on his body’s current state.

    Here’s what real-time monitoring covers:

    • Heart rate variability – not just your heart rate, but how it changes
    • Body composition changes – muscle mass, fat percentage, hydration
    • Sleep quality metrics – REM cycles, deep sleep duration
    • Stress level indicators – cortisol patterns, recovery needs
    • Nutrition absorption – how your body processes what you eat

    The crazy part? The system employs advanced sensors, actuators, and data processing units to build a resilient ecosystem that monitors and analyzes health.

    Fitness Applications That Go Beyond Step Counting

    With features like meal tracking, workout suggestions, fitness progress analytics, and recovery tools, iofbodies.com applications simplify your fitness journey by consolidating everything you need in one place.

    This isn’t your typical fitness app situation where you manually log every workout and meal. We’re talking about systems that know when you’re pushing too hard, when you need more rest, and when your body is ready for the next challenge.

    The fitness tracking includes:

    • Workout optimization – real-time form corrections and intensity adjustments
    • Recovery monitoring – when your muscles are ready for the next session
    • Performance analytics – visual graphs and data summaries make it easy for users to see how far they’ve come and where they need to improve
    • Personalized nutrition – meal suggestions based on your current metabolic state
    • Injury prevention – early warning signs before you push too far

    I’ve seen people transform entirely their fitness routines once they started getting this level of detailed feedback. It’s like having a personal trainer and nutritionist who never sleep.

    Healthcare Applications Changing Lives

    One of the most impactful applications of ioFBodies.com is in remote patient monitoring (RPM).

    This is where things get exciting. Instead of waiting until you feel sick to visit a doctor, these applications can detect health issues before they become serious problems.

    Healthcare monitoring covers:

    • Chronic disease management – diabetes, heart conditions, blood pressure
    • Early warning systems – detecting irregularities before symptoms appear
    • Medication effectiveness – how your body responds to treatments
    • Recovery tracking – post-surgery or injury rehabilitation progress
    • Preventive care – lifestyle adjustments based on health trends

    My aunt has diabetes, and she’s been using one of these monitoring systems. Instead of pricking her finger multiple times a day, she gets continuous glucose monitoring with alerts when levels get concerning. Her doctor can see the data remotely and adjust her treatment plan without constant office visits.

    The Scalability Factor Nobody Talks About

    Local communities utilize it to monitor rivers, and national programs use it to monitor the climate. Its modularity enables you to scale sensor networks according to your requirements, while also being flexible in a variety of applications.

    This modular approach allows you to start small, perhaps with sleep tracking or basic fitness monitoring, and then expand to include more comprehensive health metrics as you become more comfortable with the technology.

    Scalability options:

    • Individual use – personal health and fitness tracking
    • Family systems – monitoring multiple family members’ health
    • Community programs – group fitness challenges and health initiatives
    • Healthcare networks – connecting patients with medical professionals
    • Corporate wellness – employee health monitoring programs

    Privacy and Data Security Concerns

    Let’s be real here. Any time we’re talking about body data and personal health information, privacy becomes a huge concern.

    As IoB grows, tools like the IoBodies Privacy App could set the standard for user empowerment.

    Key privacy features include:

    • Data encryption – your information stays protected
    • User control – you decide what data gets shared and with whom
    • Transparent policies – clear explanations of how your data is used
    • Secure storage – advanced security measures for sensitive health data
    • Easy opt-out – ability to delete your data if you change your mind

    The companies developing these applications know that trust is everything. Without proper privacy protection, people won’t adopt the technology, so they’re investing heavily in security measures.

    Getting Started with IOFBodies.com Applications

    Ready to dive in? The beauty of these systems is that you don’t need to be a tech genius to get started.

    Your first steps:

    1. Assess your goals – what health metrics matter most to you?
    2. Start simple – begin with basic monitoring before adding complex features
    3. Connect with professionals – link your data to healthcare providers if desired
    4. Set realistic expectations – give the system time to learn your patterns
    5. Stay consistent – regular use provides the most accurate insights

    The Future of Personal Health Technology

    IOFBodies.com applications represent just the beginning of what’s possible when we combine human biology with innovative technology. We’re looking at a future where health problems get caught early, fitness routines become truly personalized, and medical care shifts from reactive to proactive.

    The technology keeps getting more innovative, more affordable, and easier to use. Whether you’re a fitness enthusiast, someone managing chronic health conditions, or just curious about optimizing your wellness, these applications offer insights that were impossible to get just a few years ago.

    The question isn’t whether this technology will become mainstream – it’s whether you’ll be an early adopter or wait until everyone else catches up. Either way, iofbodies.com applications are reshaping how we understand and manage our health, one data point at a time.


  • How to Use Photeeq Lens Flare for Fitness Photograph

    Ever wonder why some fitness photos look epic while others fall flat? I’ve been shooting fitness content for years, and let me tell you – mastering the Photeeq lens flare has been a complete game-changer for creating those jaw-dropping workout shots that make people stop scrolling.

    I used to struggle with getting that perfect golden hour gym shot or capturing the energy of an outdoor training session. Then I discovered the magic of the Photeeq lens flare, and suddenly my fitness photography went from amateur to absolutely stunning.

    What is Photeeq Lens Flare and Why Fitness Photographers Love It

    Let’s break this down without getting too technical. Photeeq lens flare is that gorgeous light effect you see when bright light sources interact with your camera lens. Think of those amazing workout photos where the sun creates these beautiful streaks and halos behind the athlete.

    I remember the first time I nailed a perfect lens flare shot during a sunrise beach workout session. The way the light wrapped around my subject made them look like a fitness superhero. That’s when I realized this wasn’t just a photography trick – it was a storytelling tool.

    Why Lens Flare Works So Well for Fitness Content

    Here’s what makes Photeeq lens flare perfect for fitness photography:

    Creates Energy and Movement

    • Adds dynamic visual elements that match workout intensity
    • Light streaks that emphasize motion and power
    • Dramatic atmosphere that makes ordinary exercises look extraordinary
    • Professional quality that elevates your fitness brand

    Enhances Natural Lighting

    • Works with golden hour timing for outdoor workouts
    • Gym lighting can be transformed into something cinematic
    • Backlit subjects create that inspiring silhouette effect
    • Warm tones that make everyone look their absolute best

    The Technical Side of Photeeq Lens Flare Made Simple

    Don’t worry – you don’t need to be a photography genius to use Photeeq lens flare effectively. I’ve learned these techniques through tons of trial and error, so you don’t have to.

    Basic Setup for Fitness Lens Flare

    Here’s what works in real gym and outdoor settings:

    Light Source Positioning

    • Position your light source (sun, gym lights, studio strobes) behind or to the side of your subject
    • Angle your camera so the light barely enters the frame edge
    • Move slightly until you see those characteristic flare patterns
    • Experiment with distance – closer creates more intense flares

    Camera Settings That Work

    • Smaller apertures (f/8 to f/16) create more defined star patterns
    • Shoot in manual mode to control exposure precisely
    • Use spot metering on your subject’s face to avoid overexposure
    • Take multiple shots with slight position changes

    Real-World Photeeq Lens Flare Applications for Fitness

    Let me share some specific scenarios where I’ve used Photeeq lens flare to create killer fitness content.

    Outdoor Training Sessions

    Sunrise/Sunset Workouts:

    • Position athletes between you and the sun for dramatic silhouettes
    • Capture jumping movements with flare, adding energy to the action
    • Use natural environments like beaches, parks, or urban rooftops
    • Time your shots during the golden hour for maximum impact

    Urban Fitness Photography:

    • Street lights and building reflections create unique flare patterns
    • Neon gym signs can add colorful flair elements
    • Car headlights during evening runs make dynamic backgrounds
    • City skylines provide multiple light sources for complex flares

    Indoor Gym Photography

    Here’s where Photeeq lens flare gets creative for fitness content:

    Working with Gym Lighting:

    • Position subjects between you and bright overhead lights
    • Use mirrors to reflect and multiply light sources
    • Supplement with portable LED panels for controlled flare effects
    • Shoot during less crowded times for better positioning freedom

    Common Photeeq Lens Flare Mistakes to Avoid

    I’ve made every mistake in the book, so let me save you some frustration with these hard-learned lessons about photeeq lens flare in fitness photography.

    Overexposure Problems

    What Goes Wrong:

    • Flare completely washes out your subject’s features
    • Lost detail in critical areas like face and form
    • Blown highlights that can’t be recovered in editing
    • Unbalanced lighting that makes the image look amateur

    How to Fix It:

    • Expose for your subject, not the brightest part of the flare
    • Use fill flash or reflectors to balance harsh backlighting
    • Bracket your shots to capture different exposure levels
    • Check your histogram to avoid clipping highlights

    Positioning and Composition Issues

    The biggest mistake I see people make with the Photeeq lens flare is poor subject positioning relative to the light source.

    Better Positioning Techniques:

    • Keep your subject’s face partially shaded while letting flare enhance the background
    • Use the rule of thirds to balance flare elements with your athlete
    • Consider the story – flare should enhance, not distract from the fitness action
    • Maintain focus on eyes even when using dramatic backlighting

    Equipment and Tools for Better Photeeq Lens Flare

    You don’t need expensive gear to create stunning photo lens flare effects, but specific tools make the process easier and more consistent.

    Essential Gear for Fitness Lens Flare Photography

    Camera and Lens Considerations:

    • Prime lenses often create cleaner, more controlled flare patterns
    • Lens hoods can help control unwanted flare when you need precision
    • UV filters might reduce flare intensity (remove when you want maximum effect)
    • Multiple focal lengths give you different creative options

    Helpful Accessories:

    • Reflectors to fill in shadows created by strong backlighting
    • Portable LED panels for indoor flare effects
    • Tripod for consistent positioning during golden hour sessions
    • Lens cleaning kit – smudges can create unwanted flare artifacts

    Post-Processing Photeeq Lens Flare for Maximum Impact

    Creating the flare is just the beginning. How you enhance and refine the Photeeq lens flare in post-processing can make or break your fitness photography.

    Enhancement Techniques That Work

    Basic Adjustments:

    • Highlight recovery to maintain detail in bright flare areas
    • Shadow lifting to ensure your subject remains visible
    • Contrast adjustments to make flare elements pop without looking fake
    • Color grading to enhance the warm tones that make fitness photos inspiring

    Advanced Techniques:

    • Luminosity masking to adjust different brightness levels independently
    • Gradient filters to balance exposure across the frame
    • Selective color adjustments to enhance or tone down flare colors
    • Clarity and texture adjustments to maintain skin and muscle definition

    Creating Consistent Photeeq Lens Flare Results

    The key to professional-looking fitness photography with the Photeeq lens flare is developing a systematic approach that you can repeat consistently.

    Building Your Lens Flare Workflow

    Pre-Shoot Planning:

    • Scout locations at different times to understand natural light patterns
    • Plan workout timing around optimal lighting conditions
    • Communicate with athletes about positioning and movement
    • Prepare backup plans for changing weather or lighting conditions

    During the Shoot:

    • Start with test shots to dial in your flare intensity
    • Shoot continuously during peak action moments
    • Vary your position to capture different flare angles
    • Monitor your results on the camera LCD to make real-time adjustments

    Why Photeeq Lens Flare Elevates Your Fitness Brand

    Using Photeeq lens flare effectively isn’t just about creating pretty pictures – it’s about building a visual brand that inspires people to take action on their fitness goals.

    When your workout photos have that professional, cinematic quality that comes from masterful lens flare, you’re not just documenting exercise – you’re creating aspirational content that motivates people to push harder, train smarter, and believe in their transformation journey.

    Whether you’re shooting content for your fitness brand, helping clients document their progress, or creating inspiring social media posts, photeeq lens flare gives you the tools to make every workout photo look like it belongs in a high-end fitness magazine.


  • benefits-of-hiring-a-coach

    Undertaking regular exercise is imperative in order to remain healthy while this is especially pertinent if you are looking to achieve a number of fitness objectives in a gym. Indeed, whenever you are looking for a gym coach in the city of Bangkok, there will be three essential factors that must consider to maximise the benefits of this type of personal training as well as ensure that you are able to achieve your fitness goals. Firstly, you should carry out an evaluation of the coach’s credentials and experience to ensure they possess the requisite knowledge and expertise to guide you towards your fitness goals. Secondly, it is essential to carry out an assessment of their coaching style and communication skills in order to determine whether their approach is aligned with your needs and objectives. Finally, you should consider their availability as well as their location to ensure that your schedule remains convenient and sustainable to you each and every time you train.

    1. Personalised training plan

    To begin with, one main benefit of hiring a gym coach in Bangkok is the personalised training plan that will be designed specifically to your fitness level, as well as the achievement of your objectives. Moreover, instead of following a generic workout routine, a coach will design a bespoke training plan that considers your strengths, weaknesses and objectives while this tailored approach to fitness ensures that you can maximise your efforts in every session, preventing wasted time and avoiding potential injuries.

    2. Motivation and accountability

    The second significant benefit of working with a gym coach in Thailand is the motivation and accountability that they can provide, while a fitness coach will ensure that you remain disciplined during your training sessions by setting achievable goals as well as tracking your progress. Additionally, their presence can help to develop a sense of responsibility, especially because they will hold you accountable for your performance while this approach towards fitness training helps to create a strong sense of commitment, making it easier for you to maintain consistency and stay on course to achieve your fitness goals.

    3. Maximise efficiency

    The last major benefit of hiring a coach to work with you in a gym is the ability to maximise efficiency in your training plan. Additionally, a qualified and experienced fitness coach will provide you with professional insights that can enable you to optimise your workouts by selecting the most suitable exercises, adjusting intensity levels and ensuring proper execution each and every time you train.

    • Personalised training plan
    • Motivation and accountability
    • Maximise efficiency

    Therefore to conclude, hiring a professional gym coach is a strategic decision that can provide you with several benefits when it comes to the achievement of your fitness objectives, while a personalised training plan can ensure that each exercise tailored to your needs. Furthermore, the motivation and accountability that is provided by a gym coach can help you to maintain consistency during your training regime while given their level of knowledge and expertise you can train efficiently, maximising your results and minimising the potential risk of injury.


  • Joints

    Have you ever stood up from a chair or stretched your arms only to hear a loud clicking or popping sound from your joints? It can be alarming, but in most cases, joint noises are completely normal. These sounds—commonly referred to as crepitus—can occur in the knees, shoulders, hips, fingers, and even the spine. While occasional clicking is harmless, persistent or painful joint noises may be a sign of an underlying issue that requires attention.

    If you experience discomfort or ongoing joint noises, seeing a specialist like physio Alexandria can help assess whether the sounds are simply a normal part of movement or a warning sign of a deeper problem. Understanding why joints click and when to be concerned can help you take the right steps toward maintaining joint health.

    Why Do Joints Click?

    Clicking or popping sounds in the joints can occur for several reasons. Some are completely harmless, while others may indicate strain or wear and tear.

    1. Gas Bubbles Releasing

    One of the most common reasons for joint clicking is the release of gas bubbles within the joint fluid. When you move, nitrogen bubbles can form in the synovial fluid (the lubricant that keeps joints moving smoothly). As the bubbles burst, they produce a popping or clicking sound. This is the same mechanism behind cracking your knuckles and is generally harmless.

    2. Tendons or Ligaments Shifting

    Tendons and ligaments are bands of connective tissue that help stabilize joints. Sometimes, as you move, these structures snap over bony surfaces or other tissues, creating a clicking sound. This is particularly common in the knees, shoulders, and hips. As long as the movement isn’t painful, this type of clicking is usually nothing to worry about.

    3. Joint Wear and Tear (Cartilage Changes)

    Over time, the cartilage that cushions your joints can wear down due to aging, overuse, or injury. When this happens, the rougher surfaces of the joint may rub against each other, producing clicking or grinding sounds. This can be a sign of early osteoarthritis or other degenerative joint conditions.

    4. Injury or Inflammation

    If clicking sounds are accompanied by pain, swelling, or reduced range of motion, there may be an underlying injury. Conditions like meniscus tears (in the knee), rotator cuff issues (in the shoulder), or ligament damage can lead to persistent joint noises that require medical attention.

    When Should You Worry About Clicking Joints?

    While most joint clicking is harmless, certain signs may indicate a need for further evaluation. Consider seeking professional advice if you experience:

    • Pain along with clicking – Discomfort, stiffness, or swelling could signal an injury or degenerative condition.
    • Limited movement – If clicking is accompanied by difficulty moving the joint, it may indicate a structural problem.
    • Swelling or redness – Signs of inflammation may point to arthritis, tendonitis, or other joint issues.
    • A recent injury – If clicking started after an accident or trauma, it’s important to rule out ligament tears or fractures.
    • Instability – If your joint feels like it might “give out” or doesn’t feel stable, it could indicate ligament weakness or damage.

    How to Maintain Healthy Joints

    If you experience frequent clicking or want to keep your joints healthy for the long term, consider these strategies:

    1. Strengthen Supporting Muscles

    Stronger muscles help stabilize joints and reduce unnecessary strain. Focus on exercises that strengthen the muscles surrounding your joints, such as:

    • Squats and lunges for knee support
    • Shoulder presses and resistance band exercises for shoulder stability
    • Core exercises to support the spine and hips

    2. Stretch and Improve Flexibility

    Tight muscles can contribute to joint noises by pulling tendons and ligaments out of alignment. Regular stretching can improve flexibility and reduce tension. Consider adding yoga or dynamic stretching to your routine.

    3. Stay Hydrated

    Water helps maintain the lubrication of your joints by keeping synovial fluid at optimal levels. Staying hydrated can reduce friction within the joints and minimize discomfort.

    4. Avoid Overuse and Repetitive Movements

    Repetitive strain can cause joint inflammation and lead to chronic clicking. If you perform repetitive movements for work or sports, take regular breaks and use proper form to reduce joint stress.

    5. Maintain a Healthy Weight

    Excess weight places additional stress on weight-bearing joints like the knees and hips. Maintaining a healthy weight can help prevent premature joint wear and reduce the risk of osteoarthritis.

    Should You See a Specialist?

    If joint clicking is frequent and comes with pain, swelling, or instability, consulting a professional is a good idea. A physiotherapist or doctor can assess your movement, check for any underlying conditions, and recommend targeted exercises or treatments. Early intervention can prevent minor issues from developing into more serious joint problems.

    Understanding the reasons behind joint clicking can help you determine when it’s normal and when it’s time to seek help. Taking steps to strengthen and protect your joints will not only reduce unnecessary clicking but also improve mobility and overall joint health.


  • How Much Does Jelly Roll Weigh

    The talented singer Jelly Roll, also known as Jason Bradley DeFord, has considerably decreased the size of his figure. Due to his obesity, he had to be hospitalized in 2016, and he weighed over 500 pounds. After that, he has been exercising and trying to change his life back to a healthy lifestyle, but he struggled with weight loss and relapses. His latest pledge for a new change is regarded as a new healthy living campaign, cutting over 70 pounds before mid-2024, and he plans to lose at least 100 pounds or more.

    Those factors drove Jelly Roll through years of struggle with obesity, addiction, and depression to weight loss as a true victory. The country and hip-hop artist’s real name is Jason Bradley DeFord, but he made it to a crucial turning point in the year 2016 when he was over 500 pounds. This extra weight also had an impact on his health as well as his psychological condition; due to the latter, a man developed severe depression.

    Jelly Roll


    How Much Does a Jelly Roll Weigh?

    Key Points of His Journey:

    2016 Turning Point

    Jelly Roll, who used to be over 500 pounds, started his journey of losing some weight. He first shaved approximately 200 pounds naturally and then gained it back because of stress being on the road.

    Renewed Commitment

    As the introduction pointed out, Jelly Roll, born in 1989, declared in February of 2023 that he decided to improve his health. As a result of this, he had reduced his weight to about 70 plus pounds by mid-2024 and wanted to lose 100 pounds and more. His training protocol includes walking for 2-3 miles daily, daily saunas, cold showers, and better nutrition.

    Milestone Achievements

    His major accomplishment in 2024 was completing his first 5K marathon. This was a new level for him in terms of fitness and meant that Peter was not a one-dimensional guy who only used the gym to lose weight.

    Mental Health

    For the record, Jelly Roll has not been shy to reveal the correlation that he has faced in his struggle with his weight, Substance use disorder, and mental illness. He will recover and mentally rebuild his body to be the physique fighter he was. He has done his search and has come out with renewed energy and determination, which has enhanced both his individual life and his musical life.

    Fitness and Health Regimen

    In his training, he also participates in activities such as walking, which he does frequently and nearly daily. In this case, he also uses heat and cold application wherein, after taking a sauna, he plunges into the cold pool. Along with dieting, this has made him feel even more fully charged and prepared for the activities involved in his music career.

    It is, however, evident that Jelly Roll’s journey is continuous, and his story of transformation encourages many people who go through a similar experience, proving that it is achievable at any age.


  • how-long-does-a-hollywood-smile-really-last

    Are you dreaming of that picture-perfect, dazzling smile like the ones flaunted by your favorite Hollywood stars? A Hollywood Smile, characterized by its bright, flawless appearance, has become a popular cosmetic dental choice for many.

    While the allure of a perfect smile is undeniable, it’s crucial to understand how long a Hollywood Smile can last and what factors influence its longevity. This article will guide you through everything you need to know about maintaining that radiant grin for years.

    Factors Affecting the Longevity of a Hollywood Smile

    When considering a Hollywood Smile Turkey, it’s important to understand that several factors can significantly influence how long your dazzling smile will last. These factors range from the materials used in the dental procedures to your habits and lifestyle choices. Let’s dive deeper into these aspects to help you make informed decisions and maximize the longevity of your Hollywood Smile.

    Type of Materials Used

    • Porcelain vs. Composite Resin: The materials used for veneers and crowns are crucial in determining their durability. Porcelain veneers are generally more durable and resistant to stains than composite resin veneers. Porcelain is a robust, glass-like ceramic that can mimic the natural appearance of tooth enamel and withstand daily wear and tear.
    • Advanced Dental Technology: State-of-the-art technology, such as CAD/CAM (Computer-Aided Design and Computer-Aided Manufacturing) systems, is used to craft dental restorations. This technology ensures precise fittings and better durability, contributing to more accurate and long-lasting results by minimizing human error and ensuring perfect fits.

    Quality of Dental Work and Expertise of the Dentist

    The skill and experience of the dentist performing the procedure are paramount. A well-trained, experienced cosmetic dentist can create a more aesthetically pleasing and durable result.

    Individual Habits and Lifestyle Choices

    • Oral Hygiene Practices: Regular brushing, flossing, and mouthwash are essential to maintaining a Hollywood Smile. Neglecting oral hygiene can lead to plaque buildup, which can compromise the bond of veneers or crowns and cause discoloration.
    • Diet and Food Choices: Certain foods and beverages can stain teeth and affect the longevity of your Hollywood Smile. For example, red wine, coffee, tea, and foods with strong pigmentation (like berries or curry) can cause staining. Hard foods or habits like chewing ice or biting nails can also cause veneers or crowns to chip or crack.
    • Smoking and Alcohol Consumption: Smoking and excessive alcohol consumption can reduce the lifespan of your Hollywood Smile. Nicotine and tar from cigarettes stain teeth, while alcohol, especially acidic varieties, can erode the bonding materials used in veneers and crowns.

    Natural Wear and Tear

    Restorations such as veneers and crowns are subject to daily wear and tear like natural teeth. Over time, even the most durable materials can show signs of aging. However, good oral hygiene, regular dental check-ups, and avoiding habits that could cause damage can slow this process and help maintain the integrity of your Hollywood Smile.

    Frequency of Dental Visits and Professional Cleanings

    Regular dental visits for professional cleanings and examinations are vital in maintaining a Hollywood Smile. During these visits, your dentist can identify any early signs of wear, damage, or potential issues with your restorations, allowing for timely intervention and prolonging the life of your smile.

    Average Lifespan of Different Hollywood Smile Procedures

    Each component of a Hollywood Smile has its own expected lifespan:

    • Veneers: Porcelain veneers can last anywhere from 10 to 15 years, while composite veneers may need replacement or repair sooner, around 5 to 7 years. Regular maintenance and avoiding hard foods can help extend their life.
    • Crowns: Crowns are durable and can last between 10 and 15 years, sometimes longer, with proper care. They may require replacement due to cracking, chipping, or other damage.
    • Teeth Whitening: This is the most temporary component, with results typically lasting from 6 months to 2 years, depending on your diet and oral hygiene practices. Regular touch-ups are often needed to maintain brightness.
    • Bonding and Minor Cosmetic Procedures: These can last 3 to 10 years, depending on the material used and how well they are maintained.

    How to Extend the Life of Your Hollywood Smile?

    Extending the life of your Hollywood Smile is all about commitment to good oral hygiene and lifestyle choices. Brush and floss regularly, and consider using a fluoride mouthwash.

    Regular dental check-ups are essential to catch any issues early on. Avoid nail-biting, chewing ice, or using your teeth as tools, which can cause damage. Your diet also matters; limiting foods and drinks that stain (like coffee, red wine, and berries) will help maintain your smile’s brightness.

    A Hollywood Smile can be a fantastic way to enhance your appearance and boost your confidence. Still, it’s essential to go into it with realistic expectations about its longevity and the commitment required for maintenance.

    Regular dental visits, proper oral care, and lifestyle choices will all be crucial for the longevity of your Hollywood Smile. Consulting with a dental professional can provide personalized advice tailored to your needs and ensure you make the best decision for your smile.


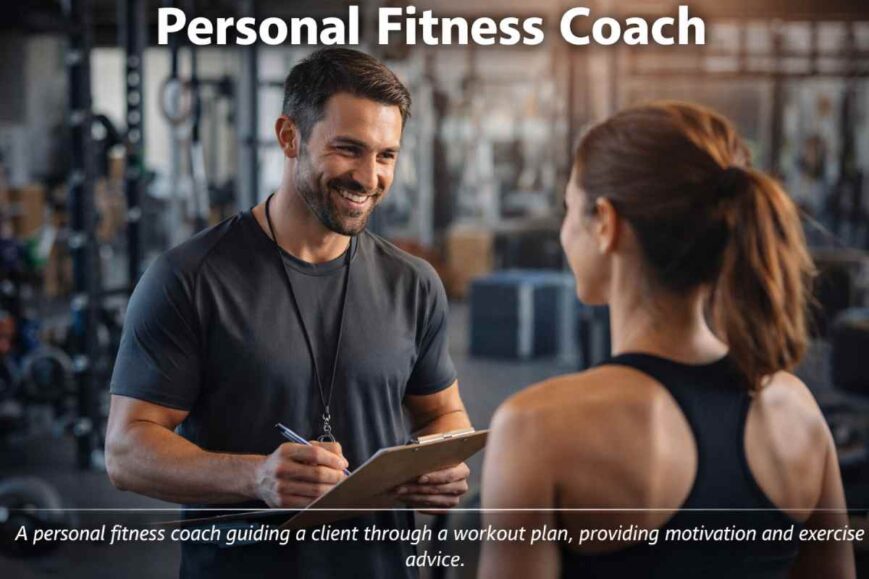
  • Personal fitness coach guiding a client through a workout plan in a professional gym environment.

    Hiring a personal fitness coach私人健身教練 can feel overwhelming, but this checklist simplifies the process. Whether you’re new to fitness or a seasoned athlete, these steps ensure you find an expert who delivers results. (Note: For general wellness guidance, a fitness coach健身教練may suffice, but for personalized plans, read on.)

    1. Define Your Non-Negotiables​ List must-haves: certification (NASM/ACE preferred), experience with your goal (e.g., postpartum fitness), availability (weekends? early mornings?), and location (in-person/virtual). Reject coaches who can’t meet 3+ items.
    2. Verify Credentials​ Ask for proof of certification and liability insurance. Avoid those with “certifications” from unaccredited online mills. For specialized needs (e.g., diabetes management), confirm additional training.
    3. Request Client References​ Contact 2–3 past clients with similar goals. Ask: “Did they adapt to your injuries?” “Were you motivated?” “Would you rehire them?” Red flags: vague answers or reluctance to share contacts.
    4. Conduct a Trial Session

    Most coaches offer a free 30-minute consult. Use it to assess:

    • Do they ask about your medical history, lifestyle, and fears?
    • Is their plan realistic (e.g., 3x/week vs. daily grueling workouts)?
    • Do they explain whyeach exercise benefits you?
    1. Clarify Logistics​ Discuss cost ($/session, package deals), cancellation policy (24-hour notice?), and tools (apps for tracking, equipment needed). Beware of coaches demanding upfront payment for 6+ months.
    2. Trust Your Gut​ Do you feel heard or rushed? A great personal fitness coach empowers you; a bad one makes you feel inadequate. If you’re anxious before sessions, keep looking.
    3. Set Milestones

    Agree on 30/60/90-day goals (e.g., “Increase plank time by 30 seconds”). Schedule monthly reviews to adjust the plan—flexibility is key to long-term success. By following this checklist, you’ll avoid common pitfalls (like hiring based on charisma alone) and partner with a coach who treats you like a unique individual, not a paycheck.

    Remember: the right personal fitness coach doesn’t just train your body—they build your confidence to thrive.

    Plan Long‑Term Support

    If you want structured guidance beyond this checklist, consider working with a coach who already understands program design, recovery, and nutrition fundamentals, such as those explained in our guide to certified personal trainers. And if your primary goal is to change your body composition, pairing 1:1 coaching with sustainable weight loss solutions can help you see progress faster without burning out.


  • vxxxv-apparel-price-2023-pdf

    Introduction

    In the ever-evolving world of fashion and apparel, understanding pricing structures can be crucial for both consumers and industry professionals. This comprehensive guide investigates the intricacies of VXXXV Apparel price for 2023 pdf, providing insights beyond simple cost analysis.

    What is VXXXV Apparel?

    VXXXV Apparel has emerged as a notable player in the clothing industry, with a pricing strategy reflecting innovation and market positioning. For those seeking detailed information about their vxxxv apparel price 2023 pdf, this article offers an in-depth exploration.

    Pricing Landscape in 2023

    Factors Influencing VXXXV Apparel Pricing

    Several key elements contribute to the vxxxv apparel price 2023 pdf calculations:

    1. Material Quality
      • Premium fabrics
      • Sustainable sourcing
      • Cutting-edge textile technologies
    2. Manufacturing Processes
      • Ethical production methods
      • Advanced manufacturing techniques
      • Labor cost considerations
    3. Market Positioning
      • Brand positioning
      • Target demographic
      • Competitive landscape analysis

    Detailed Pricing Breakdown

    Price Range Analysis

    Based on available data and market research, VXXXV Apparel offers:

    • Entry-Level Collections: $29 – $79
    • Mid-Range Lines: $80 – $150
    • Premium Collections: $151 – $300

    Digital Pricing Resources

    For those interested in the most up-to-date vxxxv apparel price 2023 pdf documentation, multiple channels are available:

    • Official website pricing archives
    • Digital product catalogs
    • Authorized retailer platforms

    Cost Optimization Strategies

    Consumer Insights

    Buyers can maximize value through:

    1. Seasonal sales tracking
    2. Loyalty program benefits
    3. Volume purchasing options

    Digital Documentation

    The vxxxv apparel price 2023 pdf provides comprehensive insights into:

    • Detailed pricing structures
    • Volume discount opportunities
    • Product-specific pricing metrics

    Technology and Pricing Transparency

    Digital Tools

    Modern consumers can leverage the following:

    • Price comparison platforms
    • Real-time pricing tracking
    • Digital product documentation

    Market Positioning Strategies

    VXXXV Apparel distinguishes itself through:

    • Innovative design
    • Competitive Pricing
    • Sustainable production methods

    Pricing Trends and Projections

    2023-2024 Outlook

    Anticipated developments include:

    • Continued focus on sustainable manufacturing
    • Enhanced digital pricing transparency
    • More personalized pricing models

    Technical Considerations

    PDF Documentation Benefits

    The vxxxv apparel price 2023 offers:

    • Comprehensive pricing details
    • Easy digital accessibility
    • Standardized information presentation

    Consumer Recommendations

    Smart Shopping Strategies

    1. Compare digital pricing resources
    2. Utilize official documentation
    3. Track seasonal variations
    4. Understand value propositions

    Frequently Asked Questions About VXXXV Apparel Pricing

    Q1: How accurate is the vxxxv apparel price 2023?
    A: The documentation provides the most current pricing information available at publication.

    Q2: Where can I find the most recent pricing details?
    A: Official websites, authorized retailers, and digital catalogs offer the most up-to-date information.

    Q3: Do prices vary by region?
    A: Yes, pricing can fluctuate based on geographic location, import costs, and local market conditions.

    Q4: Are there volume discounts available?
    A: VXXXV Apparel typically offers volume purchasing options for select collections.

    Q5: How often do prices get updated?
    A: Pricing is reviewed quarterly, with potential adjustments based on market conditions.

    Conclusion

    Understanding the vxxxv apparel price 2023 pdf requires a holistic approach considering multiple factors beyond simple cost analysis. Consumers can make strategic purchasing decisions by leveraging digital resources and maintaining an informed perspective.

    Disclaimer: Pricing information is subject to change. Always verify current prices through official channels.

    Also Read: https://www.fushionfitness.com